Gata is a much-loved Armenian dessert, often enjoyed for celebrations and as a sweet treat anytime. It’s a pastry that’s a bit like a cross between croissants and rugelach but with its own unique charm. Some people also call it “Nazook” especially when it’s filled with walnuts, a version popular among Iranian Armenians.
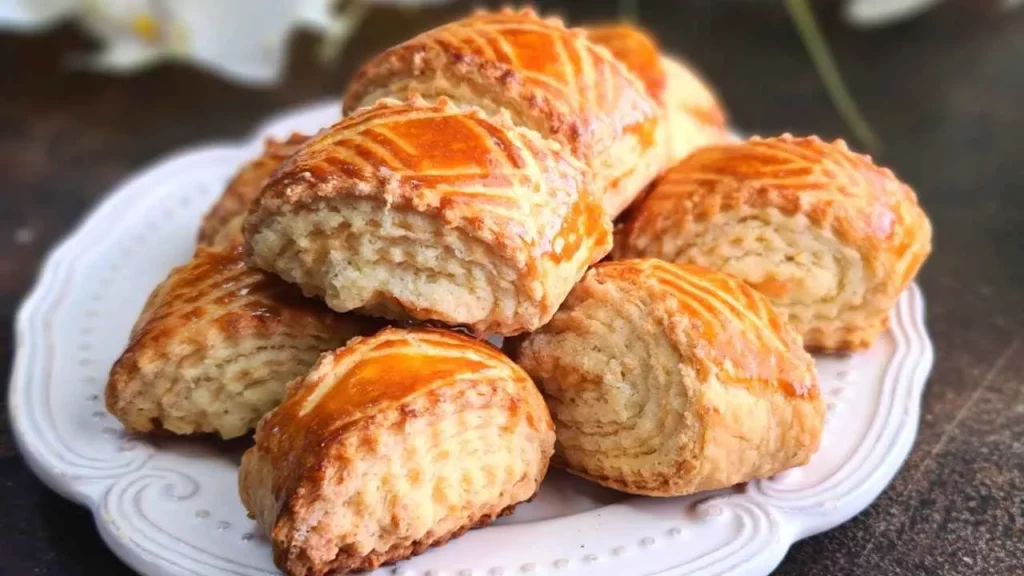
The gata is crispy on the outside, flaky inside, and filled with spirals of sweetness laced with vanilla. It’s a delightful dessert you can enjoy throughout the year.
Gata consists of sweet bread filled with a mixture called “Khoreez” made from flour, butter, and sugar. You can make it as round bread with filling or, more commonly, roll it up like a cinnamon bun, creating beautiful spirals of deliciousness.
The dough for Gata is soft and buttery, made by mixing all-purpose flour, softened butter, granulated sugar, eggs, milk, baking powder, vanilla extract, and a pinch of salt. Some versions might also include ground cardamom for extra flavor.
Slowly, you mix these dry ingredients into the butter mixture, alternating with some milk, until you have a cohesive dough.
Once the dough is all set, you split it into two equal parts and shape them into round loaves. These loaves go onto a baking sheet and can be decorated with a fancy pattern on top if you like. After a little rest, they head into the oven and bake until they’re a beautiful golden brown, and when you poke the center with a toothpick, it comes out clean.
Now, for the finishing touch on Armenian Gata, you’ve got a honey glaze. After the loaves cool just a bit, you brush them with plenty of honey. This not only gives them a shiny finish but also fills the pastry with a lovely sweetness. If you want to jazz things up, you can sprinkle almonds or sesame seeds on top for a bit of crunch and extra flair.
When you cut into Armenian Gata, you’ll find a tender, slightly crumbly texture with a rich buttery taste, nicely balanced by the gentle sweetness of the honey glaze. If you’ve added cardamom, it gives a subtle warmth and depth to the flavor.
You May Like
The Story Behind This Recipe
The roots of Armenian Gata reach deep into the culinary history of Armenia, a country in the South Caucasus part of Eurasia. This recipe has been handed down through generations and is firmly woven into Armenian culture and heritage.
Armenia boasts a long and vibrant history with a cuisine that goes back thousands of years. Many different civilizations and empires, like the Persians, Greeks, Romans, Byzantines, Arabs, Mongols, and Ottomans, have influenced the region. This rich blend of cultures has left its mark on Armenian cooking, which is known for its unique flavors, use of fresh ingredients, and traditional cooking methods.
Gata itself holds special meaning in Armenian culture. The word “gata” comes from the Armenian term “kat,” which means “cake” or “bread.” Gata is often linked to celebrations and special moments like weddings and religious holidays. It’s
Armenian Gata has evolved over time, with different regions and families adding their own twists and techniques. The core ingredients—flour, butter, sugar, eggs, milk, and honey—were staples in Armenia. Some variations include cardamom, reflecting the historical spice trade and influences from nearby cultures.
Today, Armenian Gata remains a beloved pastry, made with love and attention by Armenian families both in Armenia and the Armenian diaspora worldwide. It serves as a cherished connection to Armenian traditions and celebrates the country’s rich culinary legacy.
Whether savored during festive gatherings or as a simple treat, Armenian Gata embodies the warmth and hospitality of Armenian culture. It offers a delightful taste of tradition and a link to Armenia’s culinary history.
Ingredients
For dough
- 3 large eggs
- 1/4 cup whole milk
- 4 cups all-purpose flour
- 1 cup granulated sugar
- 1/4 teaspoon salt
- 2 teaspoons baking powder
- 1/2 teaspoon ground cardamom (optional)
- 1 teaspoon vanilla extract
- 1 cup unsalted butter, softened
- Honey, for glazing
- Almonds or sesame seeds (for garnish)
For filling
- 7 tbsp or 100g unsalted butter, room temperature
- ½ cup or 100g sugar
- ½ tsp or 2g salt
- ¾ cups or 100g flour
Step-by-step instructions for making the filling
- Get a small bowl and put flour and salt in it. Mix them up.
- Add the butter and make sure it gets all covered in the flour. Then, use your fingers to squish the butter until it looks like tiny pieces or kind of like sand.
- Now, throw in the sugar and stir it together. Keep it aside for now.
Step-by-step instructions for making Gata recipe
- In a big mixing bowl, mash the softened butter and sugar together until it’s fluffy and light.
- Add the eggs one by one, giving each a good mix before adding the next. Then, put in the vanilla extract and stir it in well.
- In another bowl, mix the flour, baking powder, cardamom (if you want), and a pinch of salt. Gradually add this dry mix to the butter mix, switching with splashes of milk. Keep mixing until the dough forms.
- Put the dough on a floured surface and knead it for a few minutes until it’s smooth and stretchy.
- Split the dough into two equal parts and make them into two round loaves.
- Place the loaves on a baking sheet lined with parchment paper, you can make pretty patterns on top using a knife.
- Heat up your oven to 350°F (175°C). Let the loaves sit for about 20 minutes while the oven gets ready.
- Bake the loaves in the oven for around 30-40 minutes until they turn a nice golden brown and a toothpick poked into the middle comes out clean.
- Take the loaves out of the oven and let them cool on a wire rack.
- After they’ve cooled a bit, brush the tops with honey to give them a shiny glaze. You can also sprinkle some almonds or sesame seeds on top to make them look nice.
- Wait for the Gata to cool all the way before slicing and serving. Enjoy.
Tips and tricks
- Let the dough rest, as the recipe says. This helps the pastry become tender and flaky because it lets the gluten relax.
- Wait until the Gata is completely cool before you put honey on it. When you brush honey on the cooled pastry, it looks shiny and sets nicely.
- Make sure your butter, eggs, and milk are at room temperature before you start. This makes it easier for everything to mix together well and have a consistent texture.
Serving suggestions
Fresh Berries: Serve a side of fresh berries like strawberries, raspberries, or blueberries. Their natural sweetness balances the richness of the gata.
Ice Cream: For a delightful dessert, consider topping your Gata with a scoop of vanilla or almond ice cream. The combination of warm pastry and cold ice cream is heavenly.
Sliced Fruit: Thinly sliced fruits like apples or pears can be arranged alongside your Gata for a refreshing contrast.
Yogurt: A spoonful of yogurt, whether plain or flavored, can complement the sweetness of the gata and add a creamy element.
Tea or Coffee: Gata pairs wonderfully with a hot cup of tea or coffee. The buttery, sweet pastry complements the warmth of your favorite brew.


